Power Apps: Develop multi-language Canvas Applications
Best Practices Canvas Apps Power Apps Development Microsoft 365 Power Platform Software EngineeringA SharePoint-based approach (that doesn’t scale)
When it comes to multi-language featured Power Platform Canvas App, mostly a SharePoint-based approach is taken into consideration:
within a SharePoint Online-based list, language labels and according translated texts fields are stored as list items somewhere in a SharePoint list somewhere in a tenant. By using the LookUp function within the app, the according translation for a given label can then called quickly from the the data source – which is SharePoint Online in this case –, making the pattern a good choice for a reliable implementation.
While the SharePoint-based pattern brilliantly works from a business perspective, it even lacks from an architectural perspective: why should it be necessary to provision and maintain one (ore more!) app resources in a complete over-sized system that has nothing in common with the app and the according solution (aka the solution where the app is stored)? Does it make sense to build a „parallel“ architecture on SharePoint Online (a SPO site, a list, multiple list items, SPO groups and user assignments, permissions – and most probably also other resources)?
To be clear: while this approach works, it doesn’t scale – because you make your solution deployment depending on concrete implementation on SharePoint online that do not have anything in common with the app or the solution itself.
App-based approach that scales (but relies on preview features)
Coming to the point: internationalization (i18n) features are solution-related or app-related features and therefore should reside within the app’s solution. Wouldn’t it be nice to have a JSON file containing all the labels and translations within the solution? This is an approach that scales out very good – deploying an app to production means also including the i18n-related functionalities and resources in the deployment assets.
There’s a way to do this and to build a multi-language app…
- … without the use of any external data source 🚀
- … by using preview features (User defined functions)
Fair enough to mention that User defined functions (UDF’s) are still not any longer in preview (since 02.09.2025; see https://www.microsoft.com/en-us/power-platform/blog/power-apps/power-apps-user-defined-functions-ga/) – but nevertheless, the approach is worth to try.
Using this approach means taking into consideration that we use it at your own risk and we always should inform our customers that the features are still in preview… 😉
Note
Make sure to activate the User defined functions from the ‚Preview‘ tab in your app’s settings
Important
This article doesn’t show how to include a JSON-based internationalization file in the Canvas App – make sure you do this at your own discretion if you’re like to do so For the sake of clearness of this documentation, the article includes translations in an in-memory collection within the app.
The implementation
App Definitions
In the Power Platform Canvas App, we have to set up the App.Formulas property:
App.Formulas
/**************************
* COLLECTIONS
**************************/
i18nLanguageSelector = {
de: {LanguageCode: "de", LanguageName: "🇩🇪"},
en: {LanguageCode: "en", LanguageName: "🇺🇸"},
it: {LanguageCode: "it", LanguageName: "🇮🇹"}
};
// The translations// 💡 TIP: you also could
i18nLabels = [
{ label: "DemoText", de: "Ich bin ein Demo-Text", en: "I am a demo text", it: "Sono un testo demo"},
{ label: "ButtonCanvas2", de: "Neuer Button", en: "New button", it: "Bottone nuovo"},
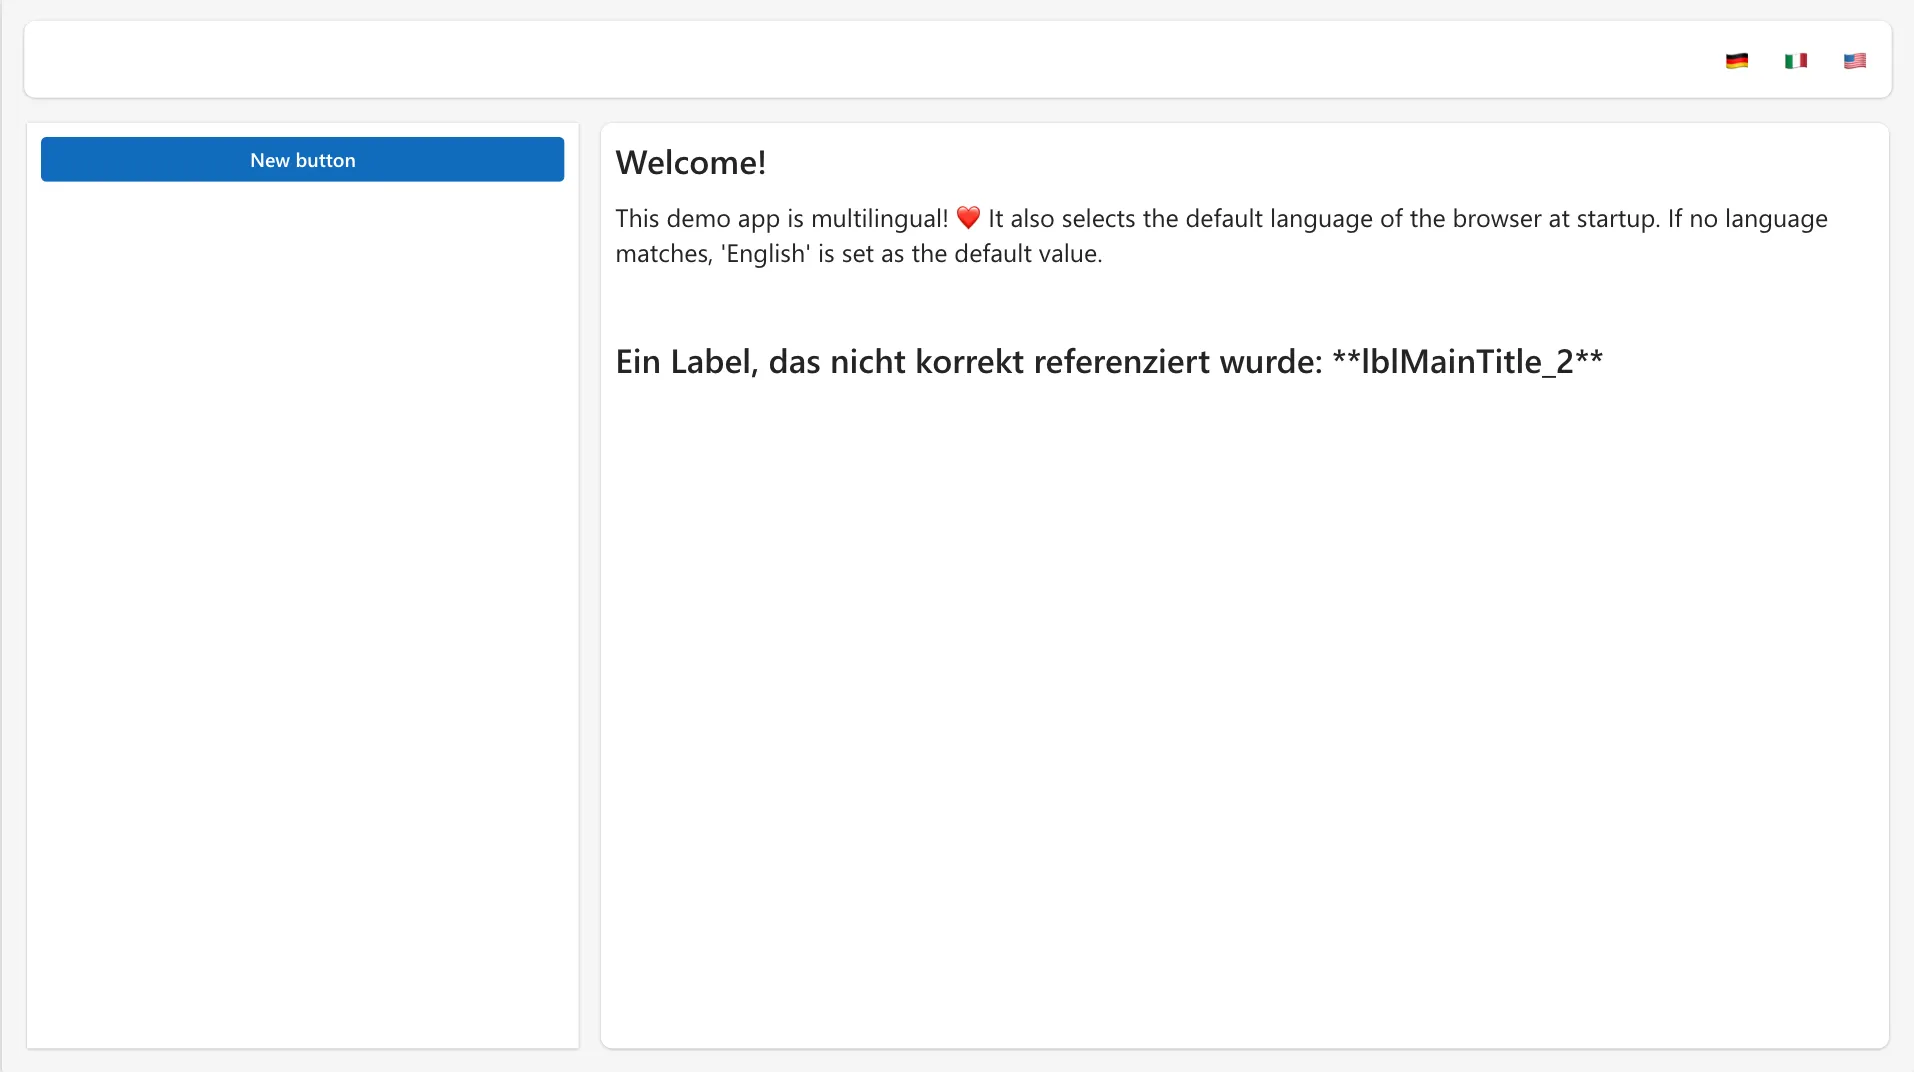
{ label: "lblMainTitle", de: "Herzlich willkommen!", en: "Welcome!", it: "Benvenuti!"},
{ label: "lblMainText", de: "Diese Demo-App kann Mehrsprachigkeit! ❤️ Zudem wählt sie beim Start die Standardsprache des Browsers. Falls keine Sprache passt, so wird 'Englisch' als default-Wert gesetzt.", en: "This demo app is multilingual! ❤️ It also selects the default language of the browser at startup. If no language matches, 'English' is set as the default value.", it: "Questa applicazione demo è multilingue! ❤️ Seleziona anche la lingua predefinita del browser all'avvio. Se non c'è una lingua corrispondente, viene impostato 'English' come valore predefinito."}
];
/**************************
* FUNCTIONS
**************************/
// Use this function to initialize language files
initTranslations(languageCode: Text): Void = {
With({
recordsWithNewSchema: Switch(languageCode,
"en", RenameColumns(ShowColumns(Filter(i18nLabels, !IsBlankOrError(en)), label, en), en, text),
"it", RenameColumns(ShowColumns(Filter(i18nLabels, !IsBlankOrError(it)), label, it), it, text),
// Default Language
"de", RenameColumns(ShowColumns(Filter(i18nLabels, !IsBlankOrError(de)), label, de), de, text)
)
},
Set(translations, recordsWithNewSchema); Trace(JSON(recordsWithNewSchema))
)
};
// Use this named formula to return translated text for a given label
t(labelName: Text): Text = With({
translationRecord: LookUp(translations, label = labelName)
},
If(!IsBlankOrError(translationRecord), translationRecord.text, $"**{labelName}**")
);The App.OnStart event
The App.OnStart then event initializes the translations according to the user’s browser language (and relate to the translations that we’ve defined in the i18nLabels collections) to set the current language after starting up the app:
// App.OnStart
initTranslations(Left(Language(), 2))
UI Components
Language Selectors (buttons)
Within the main navigation, make use of multiple buttons that allow selecting the desired language and to re-init the current.
In the following example, we use a button as a language selector (called btnLanguageSelectorDE) which is used to set the app’s language to GERMAN.

Define the attributes and events according to our i18n features that we’ve implemented in the App’s formulas:
// btnLanguageSelectorDE.Text
i18nLanguageSelector.de.LanguageName
👉 Do accordingly for any other language selector button
// btnLanguageSelectorDE.OnSelect
initTranslations(i18nLanguageSelector.de.LanguageCode)
👉 Do accordingly for any other language selector button
Every other component that displays translated text
To make the output of any component displayed in the selected language via the language selector button, we have to set the Text attribute of every component that has a translated output by using the t(…) function defined in the App.Formulas property:
// <componentName>.Text
t(“<componentName>“)
For example, the lblMainTitle label’s Text property is set to:
// lblMainTitle.Text
t("lblMainTitle")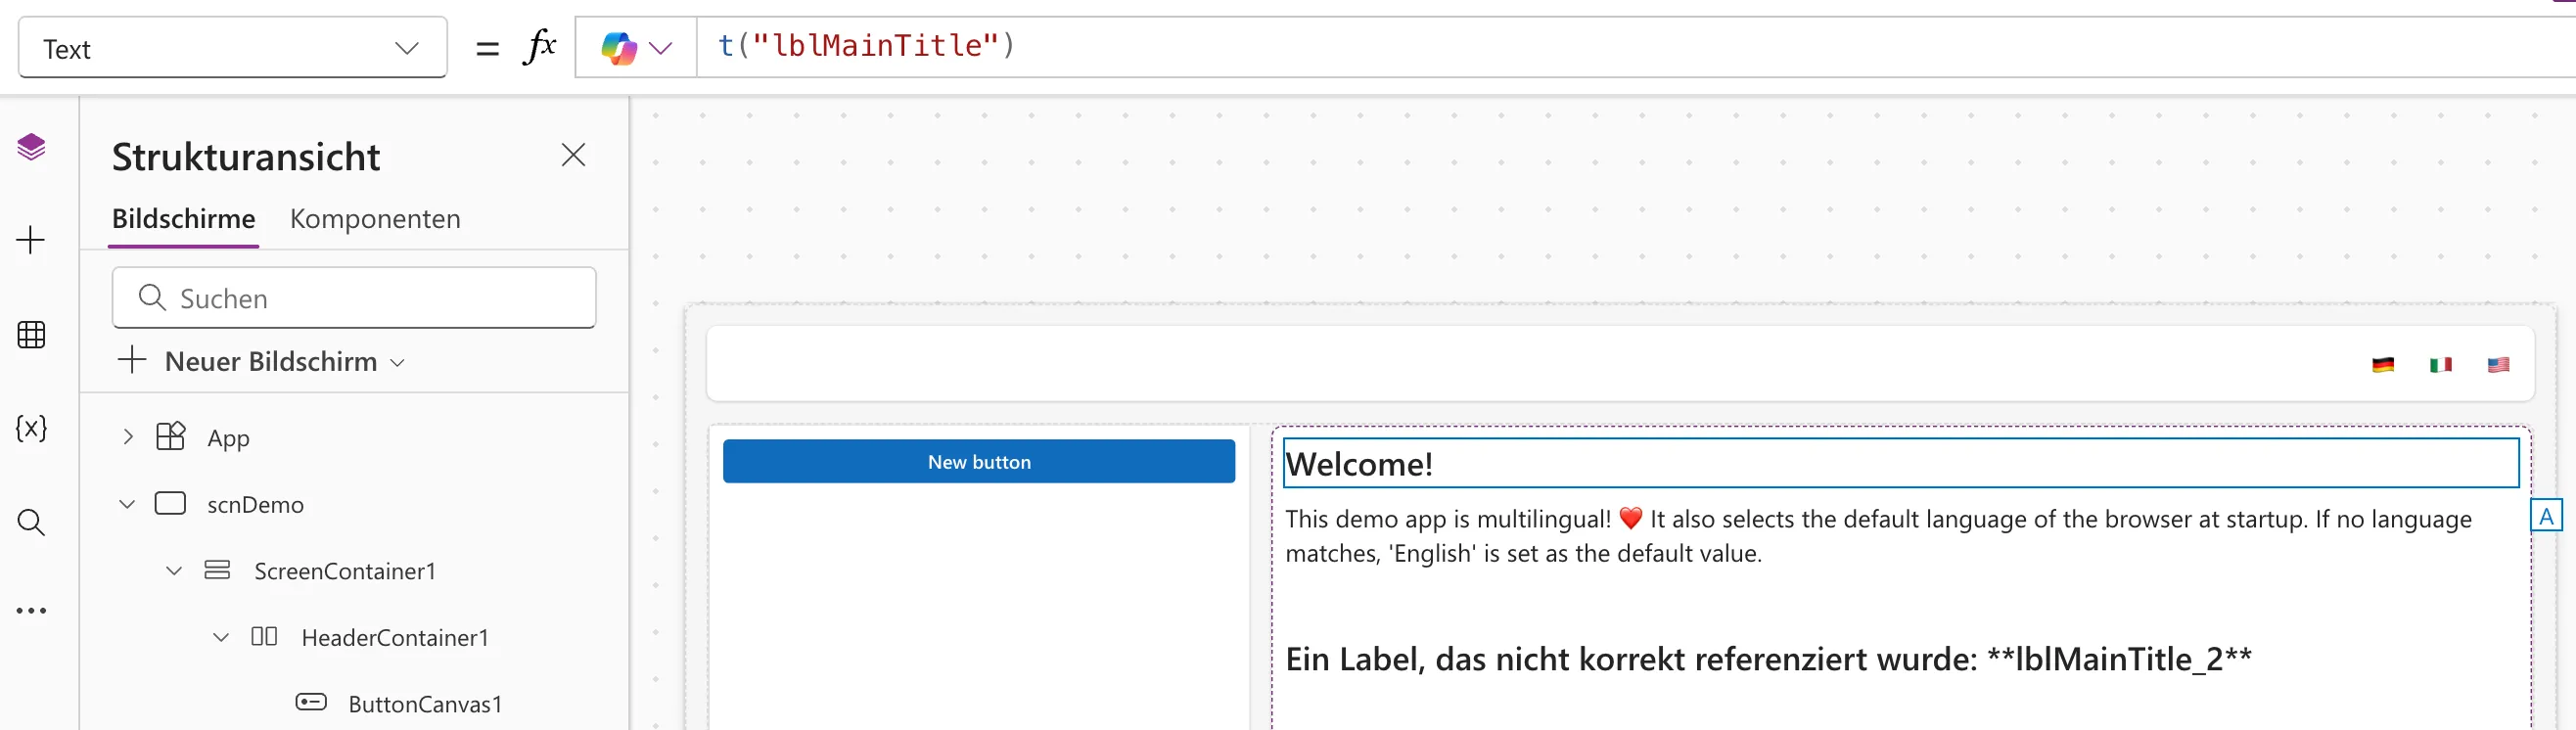
This way, the label’s text is translated according to the selected language.
Conclusion
That’s it – what do you say: fool or cool? Have fun and keep coding! 😃